When you become a seasoned aviator you will have heard many stories of “There I was….” Usually followed by “…upside down with nothing on the clock!”
Well, “there I was”, a nineteen year old who had built many model aeroplanes since the age of six, standing in the doorway at Exeter Flying Club nervously asking about their four pound ($10) trial lesson… I remember it so well. I was introduced to Rufus Heald, a veteran pilot from the RAF and the club’s Chief Flying Instructor; he was to take me on a twenty minute air experience/familiarisation flight
....................................................................................................................................................................................

A Fuji FA200 - 160
We flew in a Japanese aeroplane, a Fuji FA200 Aero Subaru, it was a misty day but we took off and flew west to Powderham Castle which we circled before returning to land on Exeter’s runway 08. I had the controls for most of this flight; the knowledge I had gained from model aeroplanes was really useful. I was hooked on flying immediately of course and twenty eight years later I still have the same excitement every time I fly, and now I get to sit where Rufus sat and enjoy the first time excitement reflected in the ‘soon to be’ aviators faces.
The French call this first flight a “Baptême de l’air”, I love this term since so many people are reborn with this first experience. So what can you expect to experience on your own Baptême de l’air?
The French call this first flight a “Baptême de l’air”, I love this term since so many people are reborn with this first experience. So what can you expect to experience on your own Baptême de l’air?
...................................................................................................................................................................................
.

Cessna 152
Wherever you go for your first flight experience in a light aeroplane you will have a similar experience to mine. The objective of this first flight is for you to feel the sensations associated with flying and to have a good experience. Your instructor will give you a basic introduction to the aeroplane, its structure and systems, and a safety briefing.
The instructor will start the engine, and then taxi to the run-up area where he or she will test the engine. Flying discipline is essential for safety, and one of these disciplines is the run-up where the engine is tested to ensure that it is fit to fly.
After the run-up the instructor will complete the pre takeoff vital actions or checks, this is where the systems are checked, seat belts are tightened, doors are locked, and the controls are checked.
The approach path is checked and the aeroplane is taxied onto the runway, and when aligned with the centerline the throttle is pushed forward until the engine reaches full power. The speed will build pretty quickly and soon the nose is raised and the aeroplane leaves the ground.
.........................................................................................................................................................................


Banking to turn right
It’s a wonderful feeling when the wheels cease to rumble on the ground and the aeroplane levitates into the air, and if the air is smooth you may not even notice until you are a hundred feet up!
Shortly after takeoff the aeroplane will have to turn to leave the airport circuit for the local area. To turn the aeroplane will have to bank, in other words one of the wings will go down, do not be alarmed by this, it does not mean that you will fall out of the sky!
Shortly after takeoff the aeroplane will have to turn to leave the airport circuit for the local area. To turn the aeroplane will have to bank, in other words one of the wings will go down, do not be alarmed by this, it does not mean that you will fall out of the sky!
.................................................................................................................................................................................................................


...............................................................................................................................................................................................................................
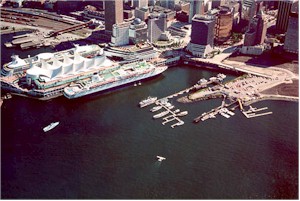
Like a ship leaving port, all your troubles will remain on the ground, as you look down on the tiny boxes in which we all live, and the Dinky cars in which we all drive. All those problems we face every day diminish in importance as they are put into perspective with their miniscule size in relation to this great vista to which we are witness, as our little flying machine takes us to a viewpoint that too few humans experience.
Your instructor will invite you to try the controls. Don’t be afraid to take control, there is almost nothing you can do that the instructor cannot sort out unless you are a body builder or something!
All too soon you will be descending to land again…

You may have trouble understanding what everyone is saying on the radio; even now aircraft radios can be somewhat incomprehensible! Don’t worry about this, aviators have their own language and we get by… With time you will come to understand the jargon that is spoken by all pilots and controllers.
This flight has two results normally, the most common one is a nightmare for your bank manager…. you’re hooked!
Few people say it’s not for them… but it does happen.
© Michael Peare 2001
ok guys.. lets see our 2nd lesson.......


ok guys.. lets see our 2nd lesson.......
Learning to fly.
Lesson One, Controlling the Aeroplane

A Cessna 152
This and subsequent articles will lead through the training process using the Cessna 152 as your trainer. These articles will be necessarily simple and so they won’t have intensive information, they will however give you the flavour of learning to fly and lead you to a better understanding through practical exercises.
In this lesson we will look at how the aeroplane is controlled on the ground and in the air.
First of all we will look at the controls and I’ll explain their function.

The Throttle, it is like the gas pedal in your car and controls the engine's Power output. The Engine RPM/Tachometer gauge is used to determine the power output by displaying engine RPM (Revolutions Per Minute). Pushing the throttle forward (in) increases RPM, and pulling it backwards (out) reduces the RPM.
A Mixture Control is used to ensure the engine is fed the right amount of fuel and air at high altitudes, we'll learn more about this later. Left of the throttle there is a Carburettor Heat control. In certain circumstances ice can build up inside the carburettor and choke the engine, we use the carburettor heat to remove this ice, and to prevent it. At power settings below 1900 rpm we apply carburettor heat to prevent icing.
A Mixture Control is used to ensure the engine is fed the right amount of fuel and air at high altitudes, we'll learn more about this later. Left of the throttle there is a Carburettor Heat control. In certain circumstances ice can build up inside the carburettor and choke the engine, we use the carburettor heat to remove this ice, and to prevent it. At power settings below 1900 rpm we apply carburettor heat to prevent icing.
The Control Column is used to control the aeroplane in flight. It can be rotated to the right and to the left, and moved forward and backwards.
The Rudder Pedals are on the floor and can be moved forward and backwards by using your feet. If you press the top of these pedals with your toes you will activate the brakes. The rudder pedals are used to steer the aeroplane on the ground, and to balance it in the air. Both brakes can be applied to stop or slow the aeroplane on the ground, or applied independently to assist the aeroplane in turning The Trim Wheel is used to reduce the control loads as the aeroplanes speed is varied in flight.

Cessna 152 Taxying
To begin this lesson your instructor will start the engine, by completing the required items on a checklist. Once started, the throttle is set to give 1,000RPM, and the engine is warmed up.
We are now ready to taxi, so we throttle back by pulling the throttle backwards and release the brakes. Sufficient Power is then applied by moving the Throttle slowly forward to move the aeroplane forward and both brakes are applied once again to check their function.
Now comes the first confusion; rotating the control column, unlike the steering wheel in the car, will not turn the aeroplane on the ground! We have to use the Rudder Pedals to steer the aeroplane on the ground; pushing the right pedal forward will cause the aeroplane to turn right, left pedal to turn left, and applying the respective brake will cause the aeroplane to turn tighter.

Rotating the control column will not turn the aeroplane on the ground!

The nose is raised to leave the ground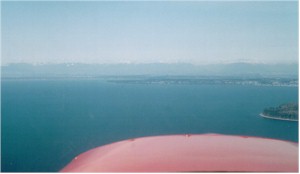
The nose is lowered to the Cruise Attitude for level flight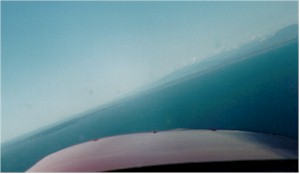
The Control Column is rotated and the aeroplane will Roll into a Bank to turn.
Following the pre-takeoff checks, we are now ready to fly so we taxi onto the runway after ensuring that we are clear to do so!
The Throttle is pushed in for maximum Power and the aeroplane will accelerate down the runway. The Rudder Pedals are used to keep straight as we follow the centerline.
To fly, we have to raise the nose so that the wings can develop lift and take us off the ground, this nose up Attitude is achieved by pulling the Control Column gently backwards. Once the aeroplane has left the ground the control loads are removed by rotating the Trim Wheel in whatever direction the control column force dictates. So for takeoff we have: Power, Attitude, and Trim!
The nose is raised to leave the ground
When we reach the altitude (height) at which we want to fly we will need to level off. In level flight the aeroplane is at a similar Attitude to that when it is on the ground, so we need to move the Control Column forward to return to this attitude. The engine Power required for level flight is less than that for the climb; think of your car going up a hill, and on a level road, you need less pressure on the gas pedal on the level road… When level the aeroplane will accelerate to a higher speed and so the pressure you feel in the Control Column will change, so we use the Trim Wheel, rotating it to Trim this load out. So to level off we have: Attitude, Power, Trim.
The nose is lowered to the Cruise Attitude for level flight
To turn in the air we rotate the Control Column in the direction we wish to turn and use the Rudder Pedals to balance the turn; this will be explored in greater detail in the next lesson.
The Control Column is rotated and the aeroplane will Roll into a Bank to turn.
In the next lesson we will look at the aeroplanes controls and how we use them to maneouvre in the air.
© Michael Peare
No comments:
Post a Comment